Our first Christmas themed tutorial will be this Vintage Deer Ornament.
Our first guest blogger is:
****************************************
Her tutorial:
I have always loved the vintage ornaments that resemble teeny dioramas....but don't have any. So I tried my hand at creating one:
I liked it so much, I decided to share how I did it. Some steps weren't photographed cause I added things AFTER it was finished. (okay, so I'm not Martha. I don't have one made and another one going through the process....)
First, gather your supplies:
*a wee little box (mine is 1.5" by 2.5")
white spray paint
glue
scissors
tiny bit of polyfil or cotton ball fluff
miniature deer (miniatures at Hobby Lobby)
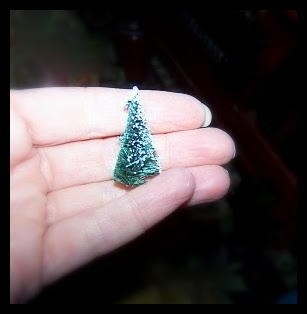
miniature trees (craft section at Hobby Lobby)
star sequins and 1 start shaped bead
variety of glitters
thick sparkly glitter glue
small amount of white sparkly felt
you will also need if hanging it:
yarn
tapestry needle
skewer
***
First, spray paint the little box white.
To make the 'sky' use a bit of glue and sparkly blue glitter...just a little. Put it on the back, top and both sides. Glue a few little sequin stars on the back at this point too.
For the snow, glue down a wee bit of poly-fil and tamp it down good. Let it dry and then pull the majority off. What you have left will be the snow. (see? no snow, no stars....I love hindsight!)Take a little tree and cut the stump off.
You can leave it on if you need the height. My little box was so tiny, I opted to clip it.
Then, cut the stumps off the remaining trees you will use. I used one big tree and two little ones.
For the back tree that will be against the box, cut the back off straight so you can glue it onto the back and it will lie flat. See?
Then arrange the other trees around it and glue them down.
Then glue down your deer.
Once dried, take your thick glitter glue and go around the trees and deer. Put a dot onto the top of each tree and drag it down with your fingertip. Do it lightly so you don't rub it completely off.
After everything is dried (again!) take a piece of the felt and cut a strip that will go around the little box.
Glue it down with the seam on the bottom.
If you want to hang it like I did you can use a skewer and put a hole in the top and in the felt. Be careful not to crush your little box. Again, this was something I should have thought of BEFORE I finished most of the ornament!!!! Oh well...that's what happens when you are crafting with wine!
Thread your yarn through both pieces and glue it together, this holds the hanger in place really well once dried.
Clip the knot as close as you can.
Once the felt is dried to the box, slather glue on it and roll it in MORE GLITTER!!!! Remember, glitter is GOOD!
Then, add a thick band of glitter glue around the front to hide the demarcation between the box and felt if you can still see it.
Now for that pesky little knot...
Then, add a thick band of glitter glue around the front to hide the demarcation between the box and felt if you can still see it.
Now for that pesky little knot...
This is where you need a star shaped bead. Simply glue it on top of the knot facing forward. This part is tricky because the space is so teeny.
If you use white glue, you'll need to let it dry on its back so the bead doesn't fall off.
This is what it looks like hung on my Year of Enchantment tree.
I love this angle, it looks so natural. I'll probably put it on my big tree though...and add glitter...maybe some more glitter...?
~~~~~~~~~~~~~~
So cute-Thanks for sharing Val~!
More guest bloggers are coming...
If you are interested in sharing a Christmas idea contact me~
~~~~~~~~~~~~~~
So cute-Thanks for sharing Val~!
More guest bloggers are coming...
If you are interested in sharing a Christmas idea contact me~


Val is a dear friend of mine! LOVE her! This is such a sweet ornament! Thanks for the inspiration!:) Lori
ReplyDeletecute and adorable
ReplyDeleteMy hubby's nana made many ornaments in that style and I have some made in the little plastic jelly containers you get in a restaurant ...they are just teeny!!
ReplyDeleteHow cute!!!!
ReplyDeleteamazing!
ReplyDeleteLove it, awesome Val!
I don't think I have the patience to do this..haha..but awesome!
I saw this in Val's blog--it's so cute!
ReplyDeleteOh, how cute is that? I bet the glitter just makes your tree sparkle!
ReplyDeleteCute easy project- I think kids would have fun collecting little trinkets to use for these.
ReplyDeleteThanks for a wonderful tutorial Val. The ornament is lovely.
ReplyDeleteLindsay
x
Awwwww that ornament is adorable!!!
ReplyDeleteThat is so creative, and very cute! This was a great tutorial! :)
ReplyDeleteI've done little vignette's like this using the bottoms of styrofoam cups. Fun!
ReplyDeletethanks for posting! It looks so good on the tree.....the glitter is awesome!!!!!
ReplyDelete